The CAPA process is a frequent topic of discussion here at Biomedisca, mainly because it's still such a big issue for medical device companies. Year after year, CAPA (corrective and preventive action) is always one of the most cited areas for 483s and warning letters during FDA inspections.
Given that your CAPA process will always be evaluated during an FDA inspection or ISO audit, it's important that medical device companies have an airtight CAPA process in place. So, here's the step-by-step process we recommend that will help any medical device manufacturer get the best results from their CAPAs.
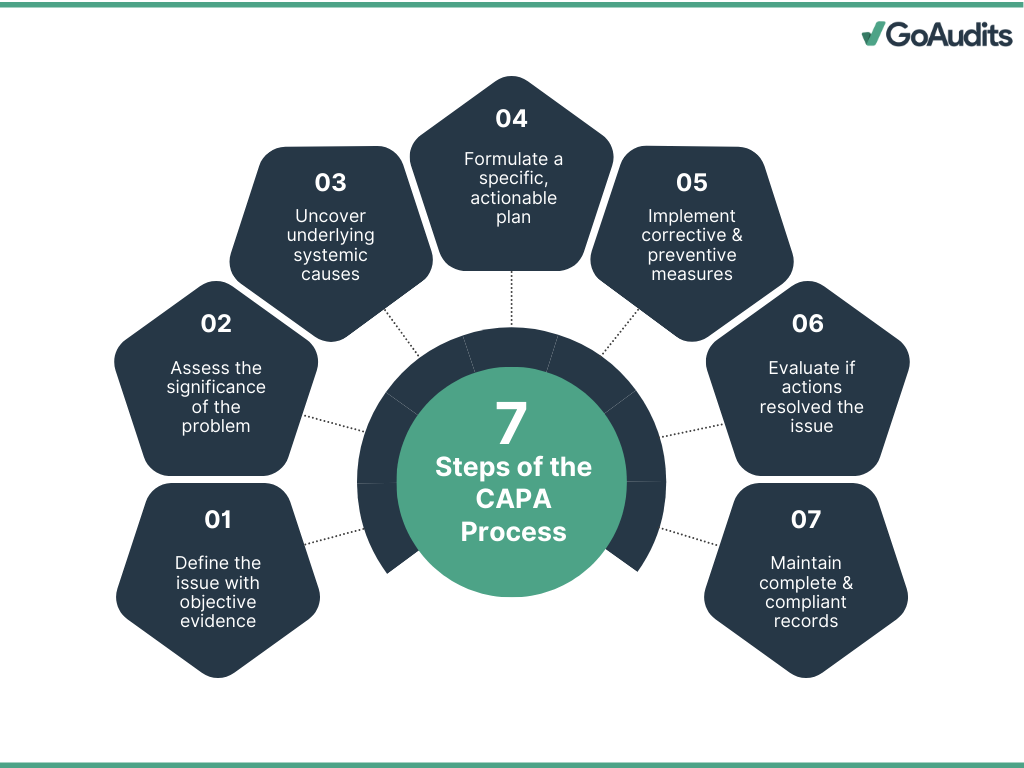
A step-by-step CAPA process
The key thing about the CAPA process is that it should be used judiciously. You want to have a great process in place when an issue does trigger a CAPA. But you also have to consider whether the issue at hand meets the requirements for your CAPA process. Remember: only systemic issues should trigger your CAPA process — not every nonconformance is a CAPA!
Create a CAPA request and submit for review
The first part of your process is determining whether the issue at hand actually requires a CAPA. Submit a CAPA request that will be reviewed by individuals with the knowledge to determine whether a CAPA is necessary. During the request, identify your sources — did the issue stem from an internal audit, a customer complaint, or a nonconformance? Be very clear about what the issue is and how it came to light.
The appropriate personnel should review the CAPA request
Your sources and reviewers will determine whether the CAPA should be accepted and formalized into your quality system. Usually, someone from quality — such as a quality manager — will play a critical role, but many companies use a Management Review Board (MRB) or Quality Review Board (QRB) to review requests as a team. Set up these meetings on a recurring basis to stay on top of all quality events.
Accept or reject the CAPA request
Once reviewed, the CAPA request will either be accepted or rejected. If rejected, the rationale should be documented and kept for your records — the issue may still require a solution, just outside of your CAPA process. If accepted, you'll move on to the next step.
The request is formally initiated as a CAPA
When a CAPA is initiated, assign it a tracking or identification number for documentation purposes and to monitor it throughout the process. There should always be a clear trail of documentation. Avoid arbitrary timelines like 'always close in 90 days' — work in a timely manner but follow your plan. If a thorough investigation takes longer, that is acceptable.
Finalize your CAPA source
Get your ducks in a row before taking action. Identify any sources contributing to the CAPA, including processes, product, or other quality problems. You'll rely on this information as you perform your investigation, so be as thorough and holistic as possible.
Determine a CAPA cross-functional team
Treat your CAPA like a project. Once you've clearly determined the sources, products, and processes involved, identify the people you need on the team overseeing the investigation — engineering, marketing, manufacturing, regulatory, or others as appropriate.
Identify any immediate actions or corrections required
Identify anything requiring immediate action. For example, if a product issue is identified, you may need to quarantine finished product affected by the issue. In extreme cases, a recall may be necessary. This step is about containment — preventing the issue from continuing or becoming more widespread before finding durable long-term solutions.
Investigate and capture findings from the CAPA
Conduct a thorough investigation of the problem. Return to the sources — product, processes, and people — and examine every aspect of the issue. Understand the who, what, when, where, why, and how. Leave no stone unturned as you seek to determine the root cause. Document all findings throughout.
Determine a root cause of the CAPA
All too often, companies skip to this step and simply restate the problem in different language rather than finding the true root cause. Without a thorough investigation, you risk never fixing the root cause — and opening another CAPA for the same issue soon. Tools like a fishbone diagram, fault tree, or the 5 Whys method can help. Take time to determine which root cause analysis is best for your situation.
Develop an action plan for your CAPA
Lay out the series of actions you'll take to correct the problem and/or prevent it from happening again. Your action plan is only as good as your root cause determination. Include specific steps and deadlines. Demonstrate that you understand the importance of closing the CAPA in a timely manner and have a process in place to do so.
Complete the action plan
Take the actions you previously identified — updating procedures, redesigning processes, or adding an inspection step. Thoroughly document these actions and keep records easily accessible for internal stakeholders and auditors. This ensures the changes stick and reflects a commitment to True Quality.
Review CAPA for completeness
The CAPA goes back to the cross-functional team and the MRB or Quality Review Board to assess whether it has been satisfactorily completed. If not, you may need to repeat earlier steps such as determining the root cause or developing an action plan. If reviewers are satisfied, it moves on to step 13.
Approve CAPA actions
Those with oversight must sign off on the CAPA investigation and outcomes. This should only happen if they feel the investigation and actions taken have successfully corrected and/or prevented the systemic issue that triggered the CAPA.
Specify steps for effectiveness verification
Many companies end their CAPA process at step 13, but that means missing a crucial part: verification. Identify methods for proving that the actions taken were effective. For example, if you added an inspection step, plan verification activities that confirm the extra step has prevented the issue from recurring. Capture all verification activities in your quality system.
Verify the effectiveness of the CAPA
The final step is verifying that the steps taken to correct and/or prevent the systemic issue were successful. If you set up your verification activities properly in the previous step, document the outcomes and assess them. If you've followed your process every step of the way, there's a good chance your actions have proven effective and you can close the CAPA.
Reference: www.greenlight.guru